It’s nasty, dusty work and it takes quite a bit longer than you think it should. And trying to fair on hundred degree days makes it much, much worse. However... it is a cool thing to see the hull go from rough plywood to a smooth surface ready for paint. And as much as I’m disinclined to hard labor, I do find that working the fairing board over the hull induces a bit of a zen-like state (but with sweat and profanity).
At first, I was planning to just fair the fiberglass seams enough to get them to blend into the sides and bottom a bit and call it good. But the more I thought about it I knew that every time I saw all those inevitable bumps and valleys, and every time another boat was just that tiny bit faster than Goodfoot, I would curse myself for not spending the extra time to get it right. Or at least as right as I’m able.
So, while claiming no expertise in the matter of fairing, here’s what I did:
First, I went after the fiberglass tape seams. The tape that I use has a fairly pronounced stitched edge that stands up quite a bit higher that the surrounding hull. (Once I figured out that these were going to be problem areas for fairing, I took to cutting this ridge away with a utility knife as soon as the epoxy set up enough to resist any movement but before it cured so much that the knife wouldn’t get through it.) To feather these seams I used the random orbital sander with 60 grit and stuck to just smoothing out the outside quarter inch or so of the tape. (This was done before applying the fiberglass cloth over the entire bottom (see previous post).
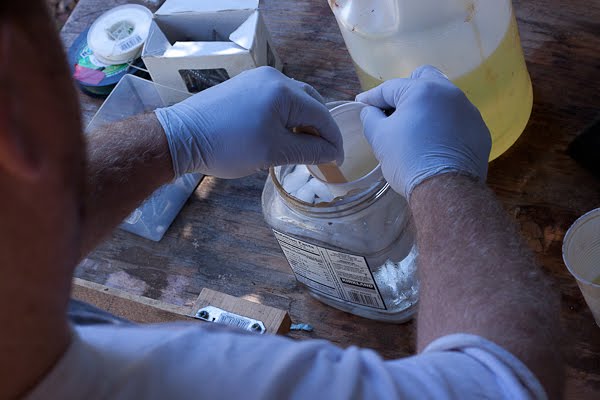
Then I gave the entire hull one coat of filler made of epoxy and phenolic microballoons.

Handy epoxy ratio scale make measuring out the correct ratio of epoxy to hardener easy.

Mixing epoxy on hot days requires an ice bath to keep things from kicking off too quickly.

Fairing mixture
Since the bottom is covered with fiberglass cloth, the goal of this layer was to fill any texture of the cloth weave and add just a tiny bit more thickness to allow for sanding.
Then I built some fairing boards in various lengths and flexibilities. The first boards I made were actually for fairing the centerboard. These were made of 1/8” birch plywood. They were fairly flexible and were quite good for working the curved sections at the bow. But for the flatter sections further aft, I wanted something heavier and stiffer. While pondering what to fabricate this board from, I was spending a few days helping my father-in-law install laminate flooring. I got to looking at the flooring planks, and it dawned on me that this was perfect fairing-board material. I fabricated handles to attached to a piece of the stuff cut large enough to fit a belt-sander belt (50 grit), and then glued a second layer of the flooring to the first. This produced a thick, straight, and barely flexible board that was perfect for the flat, aft sections of the hull.


Laminate flooring fairing board.


These shots show the first layer of fairing compound before and after the first sanding with the rough fairing board.
I used these boards to just knock off high spots in the fairing and then looked for any obvious low spots which I then filled. After this cured I went at it again with the rough fairing board a bit more aggressively, then vacuumed and wiped the hull down with damp rag. This got me to a mostly even hull with a few problem areas that were easily identifiable as small shiny spots. I kept repeating this process filling low spots, scratches, and any hollows at tape seams. After each sanding and cleaning, there were fewer shiny bits showing up. So I kept repeating this until I couldn’t find any problem spots.

Obvious low spots after the first, rough sanding. It took several bouts of filling and sanding to finally fair the areas adjacent to the fiberglass tape seams.


Sometimes it helped to circle the problem spots with a Sharpie so they would be easier to identify quickly when applying the filler.


Fewer problem spots after a two rounds of filling and sanding.


The end is in sight!
I then sanded the entire hull with random orbital starting with 80 grit and progressing to 200 grit. I could try to go smoother than 200, but since I’m planning to roll-and-tip an oil-based porch paint, I figure any more sanding would be overkill. Originally I thought I would spray on a polyurethane paint, but I figure the porch paint will make the inevitable repairs and touch-up much easier.
So now I’m pondering my next step. If go straight to painting from here I’ve read of problems with pinholes and “fish-eyes” developing in the curing paint. I assume this is from out-gassing from the fairing material. So I’m considering one layer of epoxy as a “sealer “ coat before rolling on the paint. If I do this I will likely mix in just enough colloidal silica into the epoxy to begin resisting sag and apply it as thinly as possible with a rubber squeegee, pressing it into the faired surface as much as possible. I did something like this when sealing the raw plywood surface inside the seat tanks. Doing it this way left an almost glassy-smooth surface with no epoxy drips to clean up later.
Like I said, I claim no expertise in this process so if anyone out there reading this has any input of what I’ve done so far, or how to porceed from here, I’d love to hear from you.
Next post should be painting. Also coming up is assembly of the aluminum masts.
Cheers